
Allowing your organizations unique identity to be portrayed through an invite can be simple yet effective. Luckily, Microsoft Teams allows you to share your company’s branding through customization. With these simple steps, you too can customize your invitation.
With the customization, you are able to add:
- Your Organization’s logo
- Specific URLs
- Custom footers
7 Steps to Customize Your Microsoft Teams Invite
- Sign into the Microsoft Admin Center
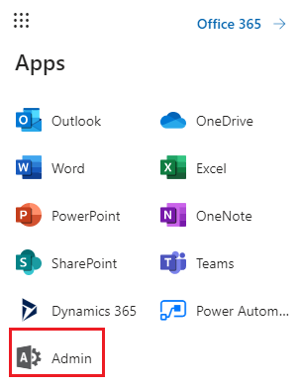
If you are already logged in, click “Admin” form the app launcher.
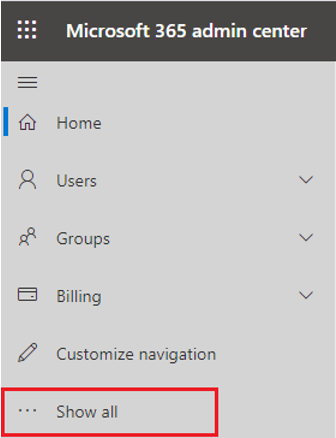
- Click on “Show All” on the left-hand side of the Microsoft 365 Admin Center.
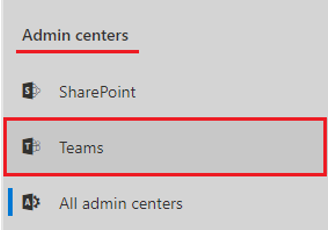
- Under “Admin Centers” click on “Teams” and you will be redirected to the Microsoft Teams Admin Center.
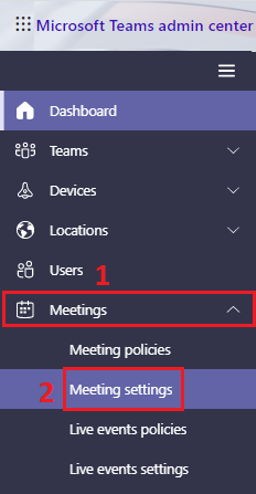
- Select Meetings Meeting Settings in the Microsoft Teams Admin Center
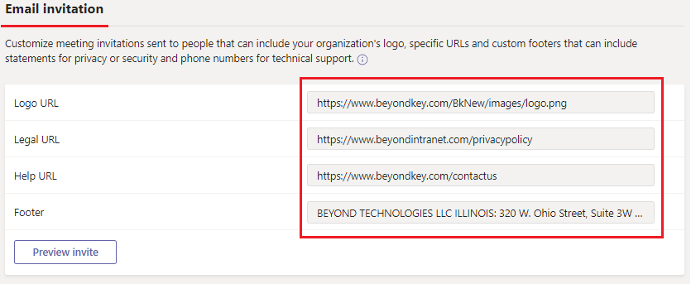
- In the email invitation section, you will be customizing the following fields.
- Logo URL – Image URL (.jpg or .png)
- Legal URL – Organization’s legal page or privacy policy URL.
- Help URL – Website contact page.
- Footer – Add privacy, disclosure, or contact information (phone number, address, etc.)
- Click on “Preview Invite” to review it before it is live.

- Scroll to the bottom of the page and click Save.

 714-333-9620